

My Fulwood pattern is an endlessly versatile sewing pattern, suitable for beginners through to more experienced makers. It’s without doubt my most popular pattern.
Here are just a few versions, some made by me and some by lovely customers:


The Fulwood is a loose fitting pull-on style with no shaping in at the waist that easily fits a wide range of sizes (from 80cm/31.5″ to 101cm/40″ bust and a few sizes either side), but if you need to tweak the size up a bit to get a better fit, here’s a quick, easy solution that I use in classes.
Make a note of how much you need to increase the pattern by, for this example we’ll use 10cm.

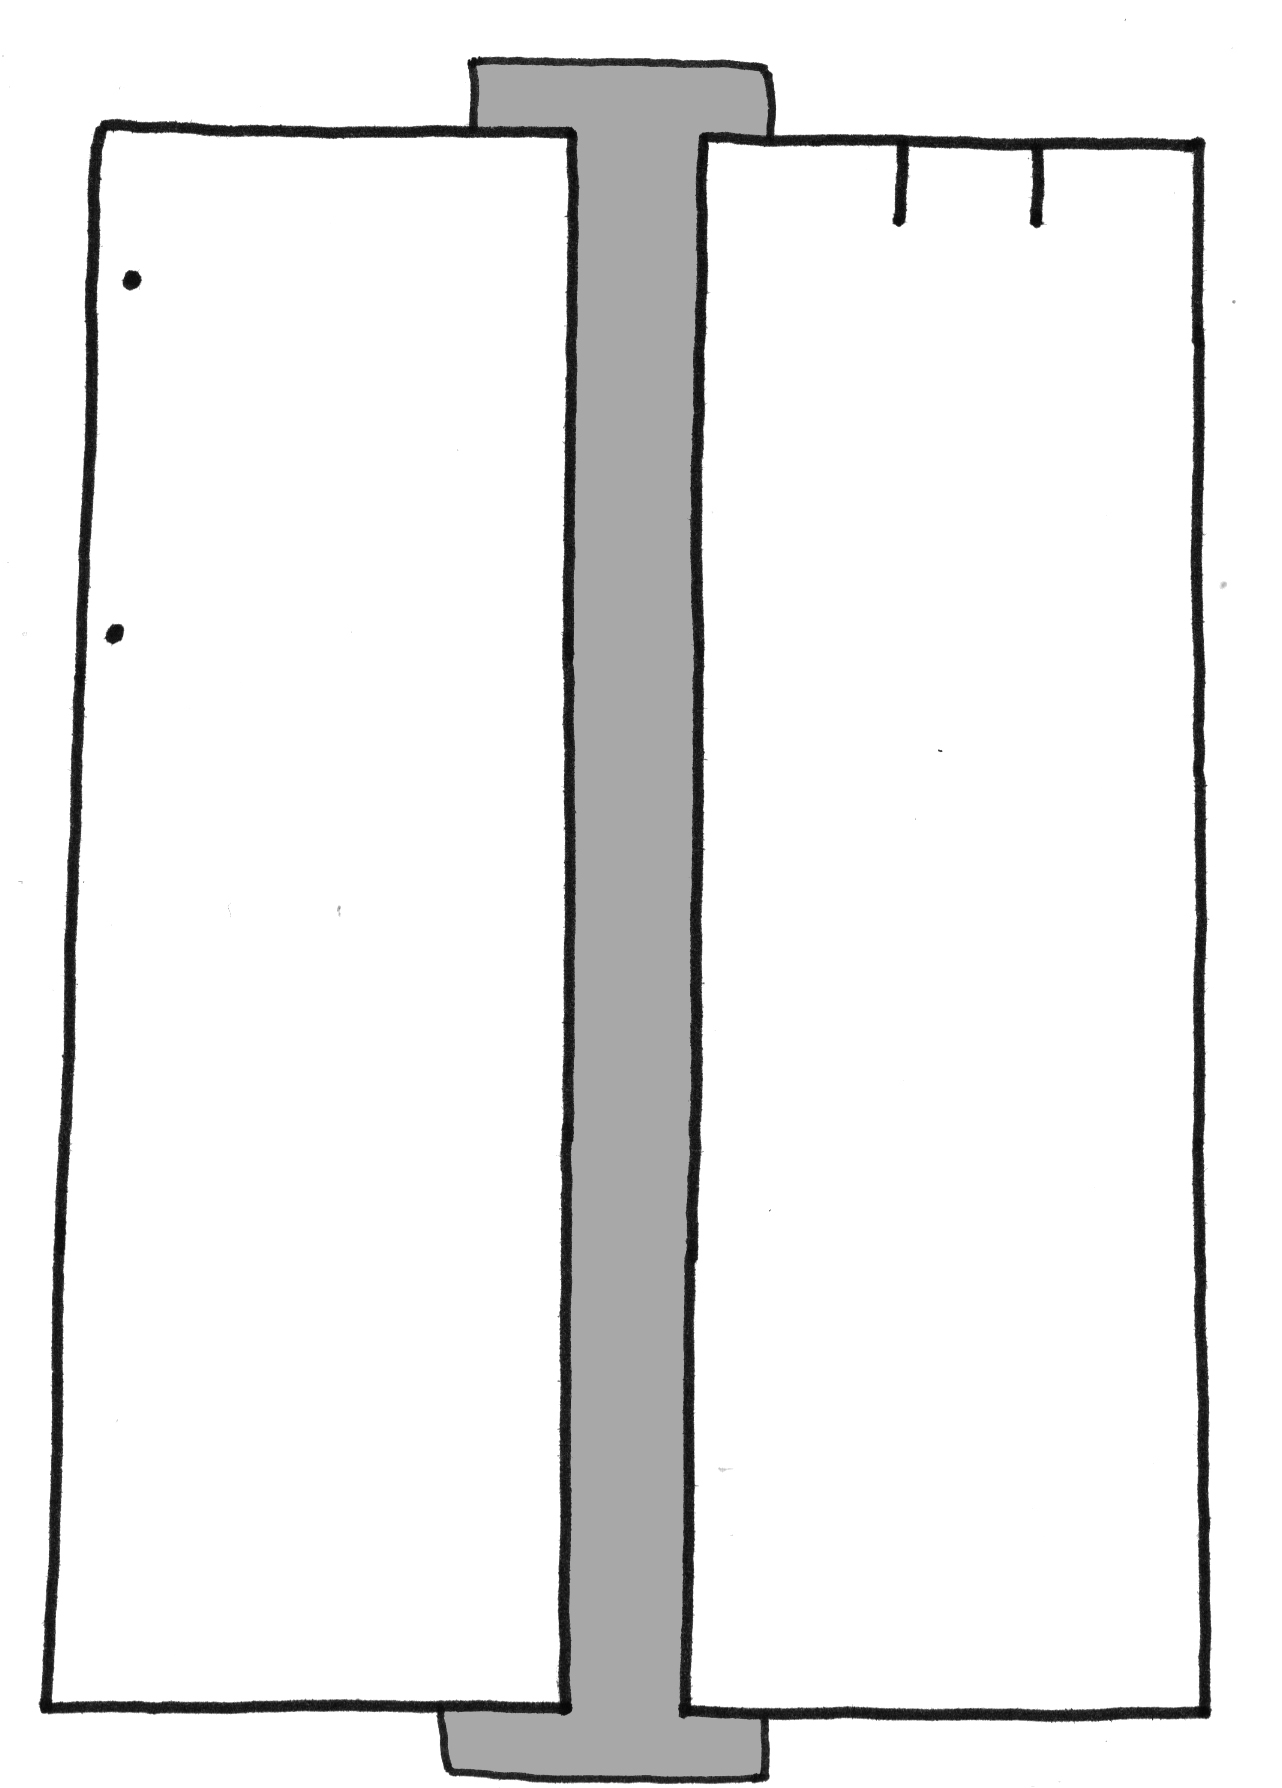
1 – Drop a straight line from the centre of the shoulder to the hem on the Front and Back bodice pattern pieces (make sure the line is parallel to the marked Centre Front / Centre Back of the pattern pieces). Cut along this line to separate each pattern piece into 2 parts.
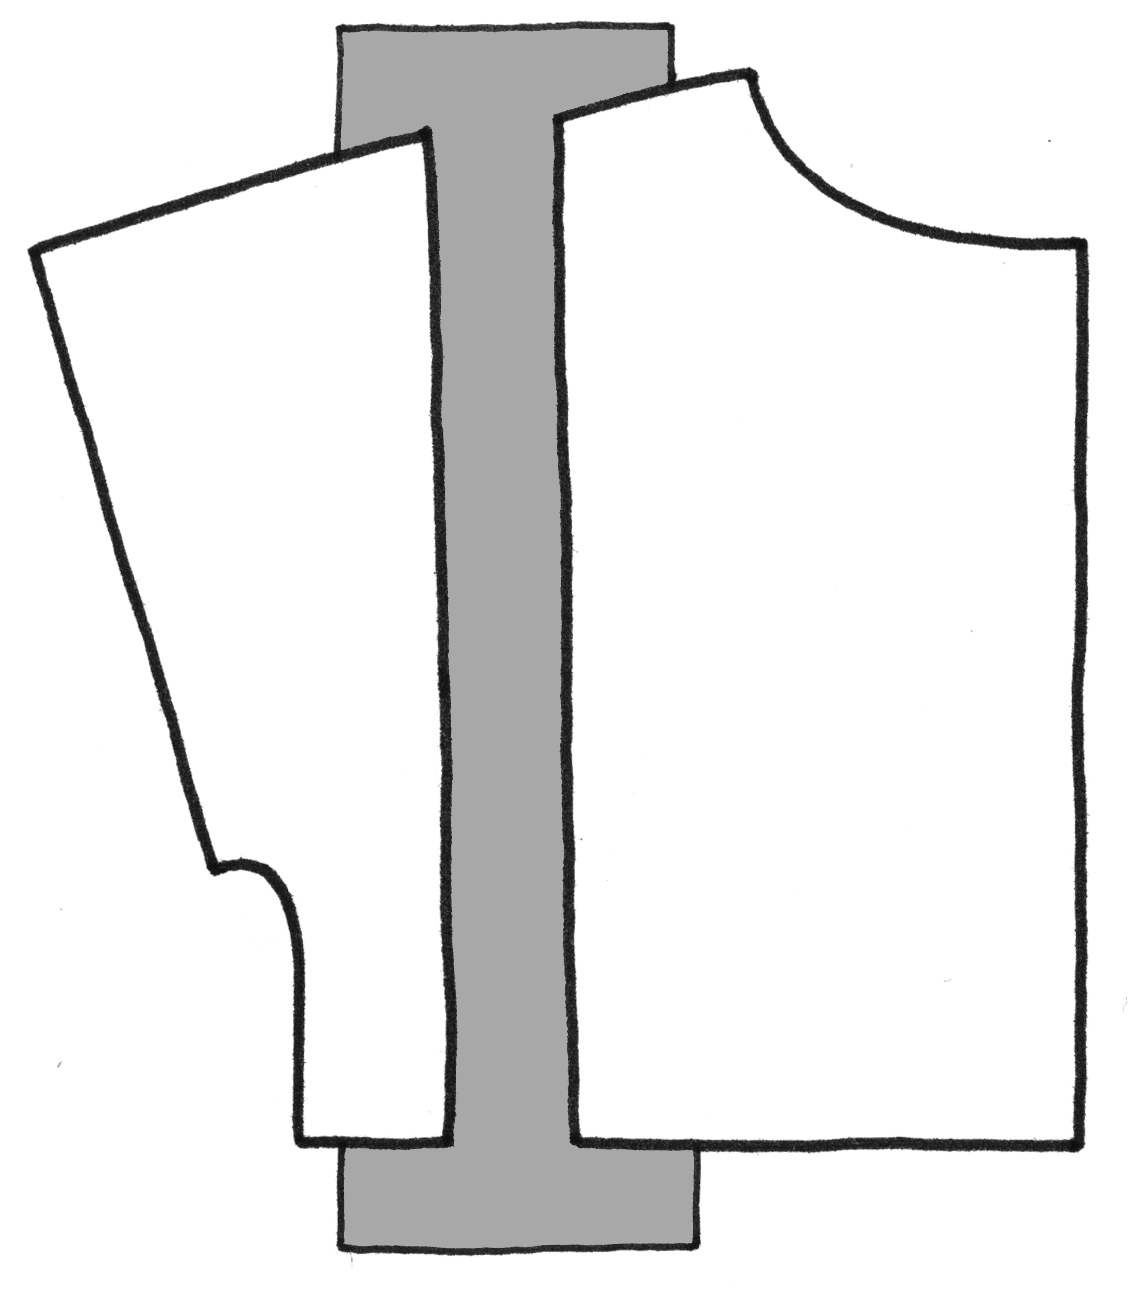
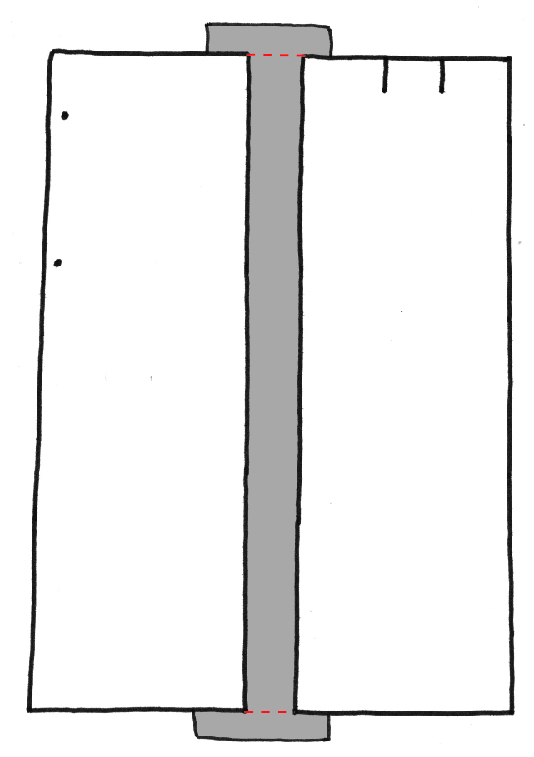
2 – Place the 2 parts of each pattern piece onto a new sheet of paper, keep the waistline at the lower edge of the pieces level. The distance that the 2 parts are separated should equal one quarter of the amount that you want to increase the pattern by. In our example of increasing by 10cm, the amount inserted here would be 2.5cm (10cm / 4 = 2.5cm).

3 – Redraw the overarm and waistline – see red dashed lines above.

4 – In some instances you might also want to increase the length of the bodice pieces and lower the waistline. To check, measure on the pattern (before lengthening) from the neck end of the overarm vertically down to the waistline, then compare this measurement on your own body, measuring over your bust (tip: it’s best to do this in front of a full length mirror!) If you feel the waistline would be sitting too high on you, lower it by the required amount.

5 – As this method also increases the waist size of the dress, you need to increase the size of the front and back skirt pieces by the same amount as you’ve increased the size of the bodice. Do this in the same way, first drop a vertical line from roughly the middle of the waist down to the hem, parallel to the Centre Front and Centre Back of the skirt.
6 – Place the 2 parts of the skirt pattern piece onto a new sheet of paper, keep the waistline at the upper edge of the pieces level. The distance that the 2 parts are separated should be the same as you did for the bodice in step 2.
7 – Redraw the waist and hemlines – see red dashed lines above.


Hello,
Where are you measuring the centre on the shoulder please? It doesn’t look like the centre from neckline to the sleeve. I have tried both that measurement and the measurement between the neck line and the side seam (I draw a line up from the side to
Meet the shoulder to get that measurement)
Thank you 😊
LikeLike
Hi, even though it doesn’t look like it in the diagram (apologies!) I measured halfway between the CF/CB and the top of the sleeve end in a line at right angles to the CF/CB. Hope that makes sense. Thanks, Wendy
LikeLike
I’ve been admiring your Fulwood for ages Wendy and have wanted to try it but have been out of the size range but now I can! Thanks for this info, when I get back sewing again I can’t wait to give it a try, especially for when it warms up a bit (which is probably ages off yet!) X Josie
LikeLike
Thanks so much Josie (and for ordering 😘). It’s a good one for layering in chilly weather too! Have you been taking a break from sewing?
LikeLiked by 1 person
I hadn’t thought of the layering possibilities, I may just be making one sooner rather than later then! I’ve been forced to sit out the sewing for a while because of ongoing rollercoaster of health issues. I’ve been knitting a little though and it’s given me chance to read more when able which slips a bit when I’m sewing. I have missed it though and have been busy making in my head at times, making plans really. Hope all’s well with you Wendy, thanks so much again X
LikeLiked by 1 person
Sorry to hear you’ve had health issues to deal with Josie. I hope it’s given you some useful thinking/planning time. Sometimes a break is good to reflect on what you’re making and why. All ticking along here thanks 🙂 I hope you’re back on track soon.
LikeLiked by 1 person
Ah thanks Wendy 😘 I’m a firm believer in that no time is a waste, even when we’re out of action. It’s nice to make but also to reflect. Glad all’s well with you X
LikeLiked by 2 people
This is the EXACT info I needed. I was going to make a test piece by adding the extra along the center fold but I knew that would throw off the neck. Of course this is how to make the pattern bigger!!! Thank you!
LikeLike
Well timed then!! Simply adding to the CF/CB is a common mistake to make, you’re in good company. I hope this method does the trick for you. Enjoy!
LikeLike
FYI, With the largest size being a 40″ bust, that does NOT indicate a “wide range of sizes”. That comment is very exclusionist.
LikeLike
The full size range I quote is a bust size of 31.5″ to 40″, in most standard sizing charts, this range covers 6 dress sizes.
Many of the smaller UK high street women’s fashion retailers offer a similar number of sizes, for example: Whistles covers 7 sizes, Toast covers 7 sizes, Hobbs covers 7 sizes, Karen Millen covers 6 sizes, Wallis covers 8 sizes in their “standard” range.
I deliberately don’t use dress sizes in my pattern sizing as I think they’re meaningless and not helpful or healthy (I’ve written much more about that here) but for reference, the sizes included in my Fulwood pattern roughly correspond to the following range of dress sizes in the retailers previously mentioned: Wallis 6-16, Karen Millen 6-16, Hobbs 6-16, Toast 6-16, Whistles 6-16.
As a small independent pattern designer who works on my own, it’s a challenge to say the least, to try and please everyone and earn a living. My Fulwood pattern is an old pattern that I launched over 5 years ago when I was known to far fewer people and my business was much smaller. Since then and since writing my books I have wanted to increase the number of sizes included in my patterns and all of my new patterns now cover at least 10 sizes (with smaller sizes added as well as larger ones). Due to the extra work and costs involved, a consequence of this decision has been that I have had to launch fewer new MIY Collection patterns.
Despite wanting to grade the Fulwood pattern to more sizes, I simply haven’t had the time or resources and so I thought that this blog post would be a good solution – not only increasing the number of people that the Fulwood would become accessible to, but also providing readers with the free resource of a simple method to grade this and similar patterns.
This is a long reply, because I felt your accusatory comment was not only hurtful, but in no way tried to take into account what might actually be going on behind the scenes of my tiny empire. It’s all too easy in the online world to fire off damning words without any thought given to the real life people that read them.
I most definitely am not exclusionist, in fact that was part of my motivation for writing the blog post – to make one of my most popular patterns more widely available until the day comes that I am able to increase the graded sizes included in the pattern.
Have a great day at your sewing machine Melissa.
LikeLiked by 1 person