
It’s my turn today in Portia’s August spectacular blog series “The Refashioners”. This year the theme is “Jeanius” and I’m not going to give the whole game away here, so hop over to Portia’s blog http://www.makery.uk to see the whole shebang.
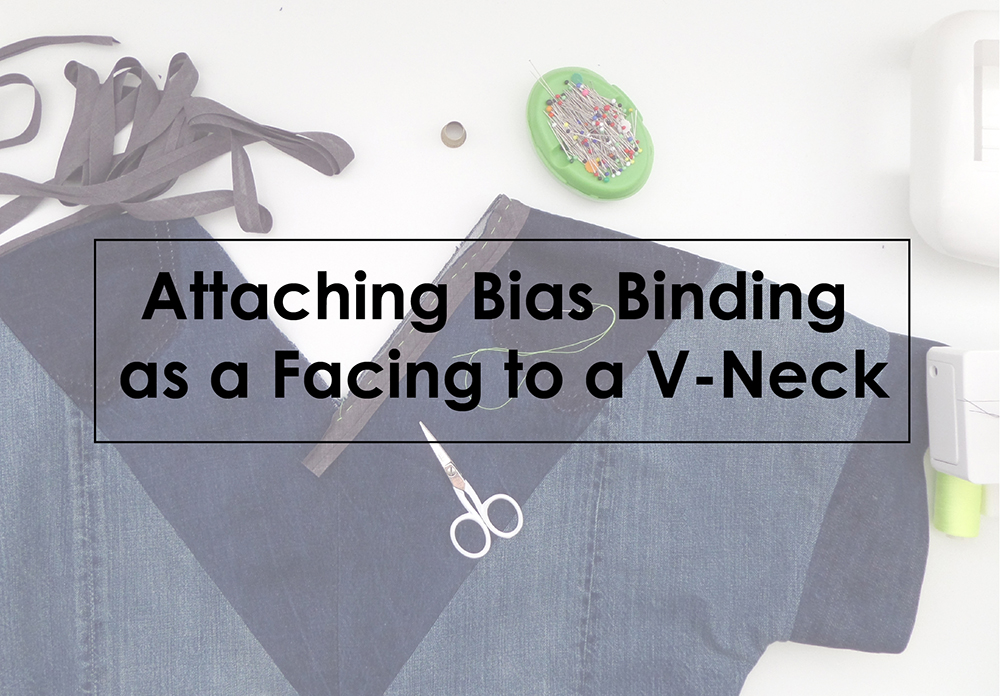
However, what I did end up doing with my project was, without even planning to, write a detailed step-by-step tutorial for how to achieve my favourite edge finish on a V-neck. So I’m going to just share that bit as a mini self-contained tutorial. Here goes:
1. Position the end of the bias binding beyond the intersection of the two seam allowances at the point of the V neck on the right side of the garment and pin in place. (I also tacked mine in place to make sure I was super accurate at the point of the V – start your tacking at the intersection of the two seam allowances at the point of the V and tack along the crease line in the binding.)

2. It helps to pin the overhanging end of the binding back on itself so that when the other end of the binding reaches the intersecting seam allowances at the point of the V you can place it in exactly the right place.

3. Your tacking should stop in exactly the same position at the point of the V as it started on the other end of the binding. Machine in place.

4. Snip into the seam allowance of the garment as close as you dare to the point of the V.

5. Let the bias binding fold back on itself to cover your stitching and then fold it around completely to the inside of the neck.

6. The two ends of the bias binding will overlap each other.

7. Wrap one end of the binding around the other.

8. Cut off the longer end of the bias binding that isn’t tucked under and pin and tack the whole of the binding in position close to the loose edge.

9. Machine the binding in place from the right side of the garment following your tacking.
NOTE: some people like to understitch the first line of machining (after step 4). It can help to keep the binding on the wrong side of the garment. I don’t always understitch, only if I’m working with particularly bouncy fabric.
Ta-dah here’s how it turned out on my Refashioners project:

If you fancy having a go at making your own bias binding, you can find my tutorial for making continuous strip bias binding here, it’s quick and a really thrifty way to use up leftover fabrics – a 47cm square can make 7.5m of bias binding!!


Ahhhhhhh, thank you so very much for this tutorial!
LikeLiked by 1 person
Pingback: Patchwork Key Largo Top – The Sewing Things Blog
Thank for this fantastic tutorial! I found this after watching a YT tutorial which used a much more complicated method and thought “I wonder whether there’s an easier way to do this.” Turns out yes, there is. It worked perfectly and was very easy to do.
LikeLike
Thank you! Glad to hear it was so helpful
LikeLike
Pingback: Marigold linen gingham Peppermint peplum dress | all the little happy things
thank you so much!!! after this post i could say that “yes, you can learn how to sew just from internet!!!!! ” it;s just what i was looking for..so clear! thank you for sharing this!!!
LikeLike
Glad to hear you found it so helpful!
LikeLike
This is the best set of instructions/illustrations for a V-neck finish with bias binding. Thank you for taking the time to do and post this for the sewing community!! Teri
LikeLike
Thank you!! Glad to hear it’s been useful for you.
LikeLike
Thank you so much- I can’t tell you how hard I’ve looked to find a tutorial that helps me understand this. You really nailed it explaining, with nice clear photos. I’m so chuffed with the stress I made now!
-Lizzie
LikeLike
That’s really good to hear, glad you found it so useful!!
LikeLike
Wendy, that was an excellent tutorial, just what I was looking for. Best looking v-neck facing I have ever done. Hurray! Mozz
LikeLike
Thanks for taking the time to leave some feedback! I’m so pleased it’s been so useful for you, it’s one of those strangely satisfying things to sew isn’t it?! Enjoy.
LikeLike
Pingback: NO-PATTERN T-shirt and Dress Project | Wendy Ward
Pingback: Ace&Jig Inspired Dress – The Doing Things Blog
This was really helpful and neat, thank you!
LikeLike
Pingback: Refashioners 2017 – Suits You! | Wendy Ward
Pingback: Black & White Triangle Back Blouse | Burda Style Magazine 2016-04-114 | Sewrendipity
Thank you Wendy for this – appreciate its not the most recent post but the instructions and accompanying photos are so clear, it’s just what I was looking for.
LikeLike
You’re welcome! I’m glad it’s helpful.
LikeLike
Pingback: A Look Back at 2016 & A Look Forward to 2017 | Wendy Ward