

SHOP


NEWSLETTER

Follow Me On

-


Pinterest
YouTube Channel


Posted in Fabric, Sewing Help, Writing for Magazines
Tagged activewear fabric, elastane content, environmental impact elastane, environmental impact lycra, environmental impact of fashion, environmental impact spandex, how to wash elastane, how to wash lycra, how to wash spandex, laundry tips, lycra content, spandex vs lycra, sportswear fabric, Wendy Ward, what is elastane, what is lycra, what is spandex
I’m embarassingly all over the sewing magazines this month, I’m afraid there’s no escaping me!


My “Behind the Seams” column in this month’s Love Sewing magazine is all about what it’s like to write a sewing book! Here’s a longer version of the article along with interviews with some of the fabulous people I got to work with on the book.

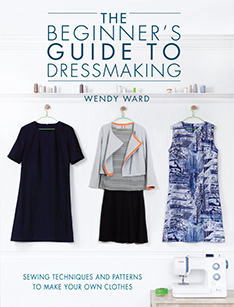
My new book “A Beginner’s Guide to Making Skirts” is out next month and credit for this month’s column must go to editor Amy, who said to me a few months ago; “I hope you’ll be writing about what it’s like to write a sewing book for your column?” What a great idea, why didn’t I think of that?! I guess that’s why she’s the editor!
So, the whole thing began with an email from Cico when I came back from holiday last year. Once I’d written a detailed proposal for the book including a contents list, research about why the book should exist, who it was aimed at and some design ideas it was finally commissioned in October 2015. That might sound like a lot of work to do before I knew if the book would even be commissioned, but all that preparation and planning was invaluable – it was then full steam ahead and I had until early December to complete the first 3 projects.
Although most readers might think of the author as the main person in the production of a book, it’s the combined effort of a tight team of people. I think trust is one of the key elements in the production of a book, especially craft books that are so reliant on imagery. Soon after commissioning I went to meet with the Cico team where we discussed the overall look and style of the book. We all brought along ideas independently to illustrate how we envisioned the book would look and it was such a relief to see we were all on the same wavelength! As an author it’s incredibly important to me for my books to reflect my style and be identifiable as my work, but likewise it’s important for the publisher to produce a book that fits in with their look and style in a way that they think will sell.
Once an overall style had been agreed, the fun could begin and what always happens at the start of every dressmaking project……fabric shopping!

I am lucky to know some fabulous fabric people and bought most of the fabrics for my samples from Gill at Ditto and Fiona at Faberwood. The remainder consisted of some bits from my stash and I was also super-excited to work with my good friend Ce of The Uncommon Thread on some experiments in hand dyeing fabric, meaning there are some really unique samples in this book.

Then began the sampling, those wonderful hours spent in MIY Workshop on my own listening to the radio, drafting patterns and cutting up fabric to turn my designs into reality. There are 8 projects in the book each with 3 variations – that’s 24 skirts I needed to make, not including the rough initial toiles I made to check and tweak my patterns.

While doing this I was writing the step-by-step instructions at the same time. That’s always how I work, I like to make notes right then and there while I’m sewing. I’ve found that way I remember the little quirks and the things that might catch people out. All the time I’m approaching my making with the mindset of “What’s the best way to explain this? What are the things about this that someone without much experience will find difficult?” That’s when I’m really drawing on all of my teaching experience. As far as I’m concerned it’s the single best tool for writing clear instructions. If you haven’t witnessed a complete beginner hopelessly muddled by a pattern they can’t figure out, then you’re going to struggle to imagine yourself in their shoes when you’re writing instructions that you want them to be able to follow.
Next came the photoshoots, 3 of them, one in December, one in March and the last in April. I made 9 samples for each of the first 2 shoots and 6 for the last one. Part of the joy of photoshoots is working with other creative professionals. They’re long tiring days and so much easier if you’re all on the same wavelength and can work well together. Lucky for me I had a wonderful team; 2 great models in Lucy and Rachel, a fabulous (and hilarious) stylist in Rob, Julian the talented photographer who also shot my first book and Anna my editor from Cico who did a great job of looking after us all. Sadly my dogs didn’t get their mutts into this book as we shot in studios in London.
 Photoshoot fuel!
 Photoshoot dreamteam L to R: Julian (photographer), Anna (editor), me, Rob (stylist).

Once the projects were finished and photographed, the techniques section of the book needed to be written up and illustrated. As well as the text I also did all the diagrams for this book.

I wrote over 20,000 words and drew over 300 illustrations, at the same time I had also been checking the editing of the project instructions. Editors who work on craft books have to be such sticklers for detail, I love working with people like that, who just won’t let the slightest little thing get past them. Sarah, my editor for this book was just that and although we never met, I feel like I know her well from the many conversations we’ve had about seemingly small details at odd hours of the day and evening (one of which was the day before Christmas Eve). Yep, dedication, that’s what you need!
I love the creative process of designing new patterns and making samples. I even enjoy the nitty gritty of finding the clearest ways to explain how to make things. I find it a really satisfying combination of creativity, problem-solving and attention to detail. Writing a book is a wonderful thing to do. Being able to devote lots of time to creative new projects and working with a talented team of experts to bring it all together is immensely satisfying. Don’t get me wrong though, to write a book alongside running a business full-time is difficult; I spent a good 6 months while writing this book often working over 60 hours a week without a day off and the rest of my life outside of work had to go on hold, so it obviously isn’t for everyone. Nor is it a guaranteed way to earn your fortune, in these days of free everything, it’s difficult for publishers (and so authors) to turn a profit, but the satisfaction of seeing my books on the shelves of bookshops, in the hands of makers and to see the wonderful things that readers make from them, well, that’s a feeling that money can’t really buy.
Here’s a bit more about some of those fantastic people who also worked hard to make this new book a reality:
Anna Galkina

Wendy: What’s your current job title?
Anna: Editor at CICO Books.
How long have you worked in publishing?
6 years.
What was your first job in the industry?
I was the personal assistant to the publisher of CICO Books (Cindy Richards).
Where and what did you study?
Fine Art Drawing BA at Camberwell College of Arts in London.
What has been your proudest moment in publishing?
When I see the books I have worked on in bookshops, that’s always a great feeling.
Has there been a project that’s been your favourite to work on?
Apart from your book?! One of the authors I work with a lot – Clare Youngs – is so innovative and always comes up with such beautiful work. I also loved working on ‘My First Dog Book’ written by the brilliant Dawn Bates as I am a bit obsessed with dogs!
What do you enjoy most about being an editor?
I like the feeling of everything coming together, it’s very satisfying to see a book grow from just talking about an idea to becoming a physical object. I also enjoy the visual element of working where I do, as all the books are illustrated.
What do you enjoy least?
Trying to keep to schedules… I know why they exist, but they make me feel panicky!
Tell us about a typical working day for you.
I get to work and make a cup of tea, check my emails and look over my to-do list for the day. I am a big fan of lists! Then it’s anything from checking artworks, getting a book ready to be proofed so we can check the colour, reading through text, drinking more tea, trying not to eat my body weight in nuts etc.
What would you like to do if you weren’t an editor?
I think I would be a full-time artist, but I would get lonely if I had to work alone all the time, so it would definitely have to be in a shared studio environment. Or I would be a psychologist, as it would be a fascinating career and I often find myself acting like one for my friends.
Tell us about the craziest project you’ve ever worked on.
There’s not been anything very crazy in my professional life, but I think the commissions I get as an artist can be a bit more crazy. I make collages right now and sometimes people have a vision of what they want which can be difficult to visualize, but we get there in the end!
Is working as an editor as glamorous as people think?
I think it’s one of those jobs that people seem to do a lot in romantic comedies, which also include architect, journalist, interior designer, and cupcake baker! It’s not very glamorous but then I don’t know if any job is when it comes down to it, but that doesn’t mean it’s not interesting!
Julian Ward (no relation!)

Wendy: How long have you worked as a photographer? How did you get into it?
Julian: My first job was straight out of Uni for a London magazine called ‘The Angel’ which was about 18 years ago. Following this I picked up small freelance jobs but not enough so found related work that kept me in the loop and enabled me to freelance at the same time. This included assisting, working on a photography course and finally picture editing before I went completely freelance in 2006.
What sort of jobs do you tend to work on?
Work comes in all shapes and sizes and ranges from advertising shoots to working with start up businesses to editorial shoots like your book!
Where and what did you study?
My photographic studies started way back at school with GCSE photography, the magic of the darkroom seduced me and led me to study a degree at Exeter Art School then later an MA at LCC.
What has been your proudest moment as a photographer?
I hope I’ve not had it yet….
Has there been a project that’s been your favourite to work on?
Im currently in the process of self publishing a book which has been a huge learning curve. I’ve really enjoyed working with a designer to bring it to fruition. I’ll tell you more soon.
What do you enjoy most about being a photographer?
For commissioned work I’d say the collaborative process and bringing a vision to someone else’s ideas. When working on my own projects its the discovery. Photography takes me to new places and encourages me to interact with people that I never would otherwise.
What do you enjoy least?
Getting my fingers caught in my old tripod leg locks.
Tell us about a typical working day for you.
There isn’t one really which is why I love what I do. Every day is different and every shoot is different. Often there are prep and research days before the shooting happens and then there is the post production following the shoot when I’m picture editing and retouching images depending on requirements. Then there is the paperwork, quotes, invoices and pitches to do so it is quite a varied day/week/month/year/life.
What would you like to do if you weren’t a photographer?
Polar explorer.
Is working as a photographer as glamorous as people think?
Yes it is although one does get tired of taking a limo to shoots and dining on lobster lunches. (Something tells me Julian might be having us on a bit here, don’t you?!)
You can find more of Julian’s gorgeous work here.
A big thank you to Anna and Julian for taking the time out of their busy days to be interviewed by me and I hope you’ve enjoyed reading about the making of “Beginner’s Guide to Making Skirts”. I can’t wait to see it published, it’s out 6 weeks today on October 25th and you can pre-order your copy here.

I really enjoyed choosing my 6 inspirations and must-haves for Sewing Network magazine’s “Blogger Picks” feature this month.
In true form you might easily guess some of my choices, but can you guess all of them?!
Gees Bend Quilts
I love the social history of patchwork and quilting. I find the idea of the stories and meaning held in quilts made from re-used clothing really powerful and they can make me quite emotional. Ever since I first saw images of the Gees Bend quilts they’ve been a constant source of wonder and inspiration for me. I love their honest beauty.
Worn Stories by Emily Spivack
The idea behind this book is simple; the author asked people she knew to tell a story about a piece of clothing in their possession, something significant that happened in their lives while they were wearing it. It makes for fascinating reading and a bit like the Gees Bend quilts, reminds us of the significance that clothing can have in our lives and that it is more than a disposable commodity.
The Community Clothing Project
Began as a kickstarter project and championed by Patrick Grant this is a great project. Based in one factory in the north of England it aims to reinvigorate garment manufacturing in the UK by using the seasonal quiet times faced by all factories producing for brands to make their own range of good quality basic items such as jeans, harrington jackets and raincoats.
Just up the road from my hometown of Sheffield, Yorkshire Sculpture Park is heaven, how could it not be when it combines art and beautiful Yorkshire countryside?! There are permanent works set outdoors as well pieces from featured exhibitions and several indoor galleries including the stunning Longside Gallery whose huge windows not only flood the gallery space with natural light but also perfectly frame the most perfect views of the green valley below.
This might be my favourite of all my patterns. It’s one of the most popular and I’ve personally made myself at least 8 versions. It’s easy to wear and easy to sew which makes it a good first dressmaking project for beginners. However, I think its real secret is its versatility; it works in almost any fabric and can be made as a top or a dress in lots of different combinations. I’m always finding new ways to make it. I enjoy working that way; I’d much rather explore the potential offered by one pattern rather than churning out pattern after pattern.
Again, harking back to objects with meaning that can tell stories, I love my handmade Ernest Wright scissors. They’re made in my hometown of Sheffield and I’ve visited their factory to see them being made. It takes a huge amount of skill to make a pair of scissors and it shows in the finished product – they cut through anything and are sharp along the full length of the blade, including the tips. They’ll last you a lifetime and the more you use them, the more they wear to your hand and your particular grip. I love that. You can buy unique MIY Collection branded while handled scissors here.
Want to hear more about what I’m up to and get subscriber-only resources and offers? Join my newsletter and see what you’ve been missing!
Posted in Writing for Magazines
Tagged beginner sewing patterns, blogger picks, community clothing, easy sewing patterns, ernest wright & son, fulwood dress, Fulwood Pattern, gees bend quilts, indie patterns, interview, MIY collection, miy fulwood, sewing inspiration, sewing magazine, sewing must-haves, sewing network magazine, sewing patterns, Wendy Ward, worn stories by emily spivack, yorkshire sculpture park

Remember this post that I wrote asking if your sew-jo has ever left you and how you’ve got it back? Well, responses to that post, comments I got from people on my Instagram, Twitter and Facebook feeds and a bit of my own research have resulted in a comprehensive article for this month’s Love Sewing magazine. So comprehensive in fact that it needed to be quite heavily edited to fit into my allotted double page spread! Not one to let work go to waste, here is the full piece in all its unedited glory.
May your sew-jo never leave you again!

How do you get your sew-jo back?
I’ve been sewing for over 30 years and there have definitely been times in my life when sewing has been more and less important to me. Most of us have times when our creative outlets have to take a back seat because life just takes over, but that’s normal and it doesn’t mean we want to do it any less, in fact often we want to do it more at these times, precisely because forces beyond our control are keeping us from it!
But what if your drive to create leaves you completely? Has your enthusiasm for sewing ever left you temporarily? Again, although it’s scary, I think it’s a perfectly normal phenomenon and comes as part of the creative package. After working 60 hour weeks to write my new book whilst keeping the rest of my business going for the last 9 months, mine was definitely on the wane recently.
I hope the sharing of some of my own experiences on this subject and the collective wisdom contributed by other sewists will help should you find yourself stuck in a creative rut.
Why does it go?
So what are the most common causes of this sewing equivalent of writers’ block?
Perfectionism & Fear of Failure
Perfectionism is the enemy of creatives, it’s a fine balance; I think a little bit of a perfectionist tendency can be useful as it keeps you striving to do the best you can and constantly improving your work, but too much can be the complete opposite and actually stunt creativity. The way it manifests is the thought creeping into your head that if you did that thing you’ve been thinking about making; “it would be a bit rubbish and never as good as it should be, so I might as well not bother”. I’ve definitely suffered from this in the past and the way out is simply to just allow yourself to make a mess, accept that mistakes are useful and help to develop your work, how can you learn if you don’t make mistakes? It’s impossible to just be perfect all the time, how could you ever develop and improve on perfection?
Logistics
This was a recurring theme for the sewists who shared their experiences with me online; if everytime you sew you have to clear the dining table, unpack your project and your sewing machine, it’s often time to put it all away again as soon as you’ve started, so why bother?
Too Much Sewing For Others
Taking on too many projects for others was a cause mentioned by a few people online. While it’s rewarding to make things for others (when they’re well received!), make sure you put time aside for selfish sewing too.
Are You Happy?
There is a theory that you need to be in the right headspace to be creative, happy and relaxed and unencumbered with too many worries. Bobobun68 on instagram shared an example of this saying “I sewed nearly every day until my dad died and then it went for months. When my marriage ended two years ago I could manage work and being a mum but all creativity went. As my happiness returned sewing and inspiration came flooding back hugely like an addiction. I’ve pushed myself to learn more and I’m loving it, so I’d say my sewing mojo is heavily influenced by my emotions.”
However, there is a parallel theory that if you’re not happy to start with, being creative can actually help to make you happier; a theory which is backed up by phychological research explained in this brilliant piece about overcoming writer’s block by Maria Konnicova on the New Yorker website: http://www.newyorker.com/science/maria-konnikova/how-to-beat-writers-block If you can push yourself over that initial hurdle to start creating when you’re feeling low, the creative process will usually leave you feeling in a much better place.
How do you get it back?
Variety & Learning
They say variety is the spice of life, so try a different craft from sewing; learning something new is always really absorbing and rewarding, so get a friend to show you or take a class. There are some brilliant short classes to get your creative juices flowing again on Creative Bug.
Inspiration
Fresh inspiration surrounds us in magazines, books and online. Join a local creative group or connect with fellow makers online. I recently got myself a copy of Oh Comely magazine as an antidote to purely sewing magazines; it’s still aimed at creative types but encompasses a lot more. I’ve heard Flow and Frankie are also great reads.
Instant gratification
Sew something quick and small or something safe that you’ve made before and you know works well, I love verykerryberry’s advice on Instagram to sew pyjama pants. The perfect remedy I’d say, who doesn’t need more cosy pymama pants and they’re easy to sew for others too.
Get out there
Walk the dog, go for a run, go to the gym, I find any kind of exercise refreshing and invigorating to mind, body and creative soul. This is one that definitely works for me and that I use a lot; I’ve often had some of my best ideas while dripping with sweat in the gym!!
Focus
Focus is always useful to me, if I think “oh I can make anything I want”, I can’t make anything! Whereas if I think “I’d like some new t-shirts”, I’m off!
Do the washing up
Any kind of mindless repetitive physical task can help unlock the creative part of your brain.
Dedicated space
Try and organise a sewing space at home, no matter how small, even if it’s just keeping your machine accessible (and visible as a constant reminder) on top of a cupboard or shelf ready threaded up and with your project neatly nearby you’ll be able to grab small bits of sewing time as and when the urge takes you.
A project for every circumstance
Have a few projects on the go and I do say this with caution as being a serial “starter” can also lead to sewing misery; you need to be a “completer” too. Some great advice from Deborah who commented on my blog was to make sure you have a small portable project as one of your projects on the go. That way you can take it on train journeys, do it in front of the TV and possibly even take it into meetings at work….!!
Have some “playtime”
Open up the floodgates – whenever I write, it’s like a stream of consciousness and ideas at first, I never write something polished and finished from the start. I like to edit heavily! It’s the same with sewing; I play around with ideas, use some cheap fabric that I’m not worried about spoiling and make lots of toiles, play around with some fabric embellishment or manipulation ideas or hack away at an old garment that I was going to throw out anyway.
I love some of the advice in this post on the Brainpickings blog, especially the tip from artist Lisa Congdon to spend 30 days doing repeated drawings of something that you’re already comfortable drawing. You could easily apply this to sewing: make a few versions of a quick tried and tested pattern, but use different fabrics, try some easy style adaptations to the pattern, add some embellishments, even try making it from recycled old garments.
Gift Sewing
While sewing for others can sometimes cause you to lose your sew-jo, certain types of selfless sewing can also be a way to reconnect with the joy of sewing. I love the approach of poppiesgrowinva on Instagram who says: “When I feel down about sewing I sew something super easy like a pillow cover or stuffed bunny for my boys. Sometimes “selfish sewing” doesn’t feel as great as you expect it to. Sewing things others can enjoy and benefit from, those have been my favorite makes!!! We are also too critical of ourselves. When you make a simple gift for someone they don’t see any of the flaws you see yourself when sewing! It can help you see that things don’t have to be perfect!!” Also a good technique for when the perfectionism monster tries to take you over…
Go back to things and edit/rethink
I often use a technique that I call “tricking myself into working” rather than sitting down with a blank page, fresh piece of fabric, brand new word doc open on my computer and thinking “right, now I’m going to do that thing” I just make adhoc notes and randomly try stuff out as and when it pops into my head and before I know it I have a new project, pattern, blog post well underway. An essential tool for applying this technique is to have a notebook/sketchbook and pencil with you at all times!
Remember: the end result isn’t always the be all and end all.
Children never suffer from these creative blockages, they create with that beautifully uninhibited approach of simply enjoying the process without focusing on the end result being the be all and end all. Social media, whilst being a wonderful place to share, encourage and seek inspiration that can help you rediscover your sew-jo, can also be a place to make you feel inadequate and like you’re not coming up to scratch. If so, unfollow the people who most make you feel that way or take a break completely for a while. Most important is what you’re doing and how much you’re enjoying it, not what everyone else is doing.
On a bigger, longer term solution I think it’s healthy for creative types to build variety into their everyday working and / or hobby lives.
I think I’m quite lucky in that I’ve managed to carve myself a job where I get to do a variety of differently creative tasks. Take writing this column! I love writing and it’s great to have an outlet and a purpose to write and while still being creative and thoughtful, it’s different to sewing.
I’ve also recently taken on a collaboration to work with a local charity on some clothes recycling projects and have recently finished my contribution for this year’s The Refashioners.
Even my most recently acquired hobby (learning how to play trumpet) taps into this need, I experienced my last creative lull about 18 months ago and realised that I needed to redress my work/life balance. I decided to learn a musical instrument because a) it’s good to keep learning b) it’s another creative outlet unrelated to what I do to earn a living and c) it’s something I know I can get absorbed in and get “flow” from, the way I can with sewing.
So, don’t give yourself a hard time, embrace a little creative block as part of the creative process and a reminder that you need a bit of variety and a bit of nourishment for your creative soul. Go out for a walk, take that online class and break out the colouring pencils!
Thanks to everyone who contributed their stories online.
Want to hear more about what I’m up to and get subscriber-only resources and offers? Join my newsletter and see what you’ve been missing!
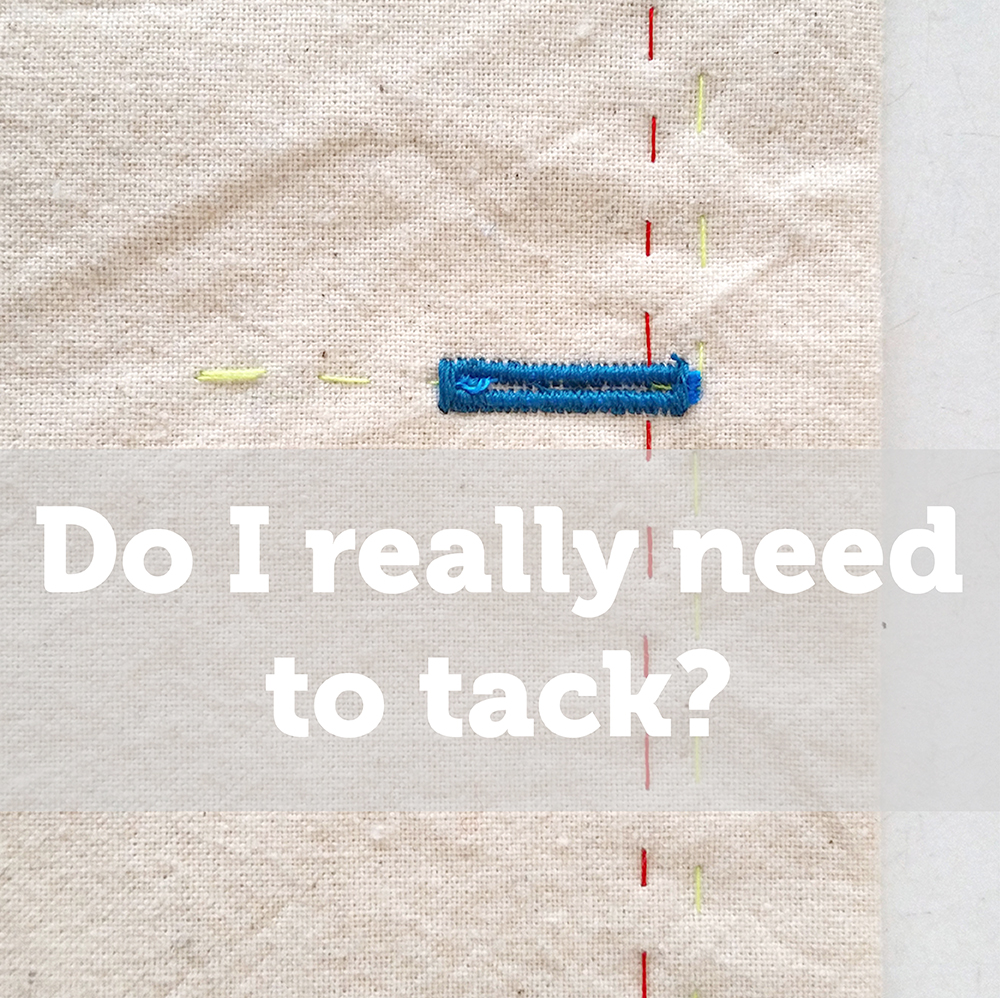
You’d think I get my sewing students to do this for my own amusement sometimes if you came to one of my classes!! If I had a pound for every time I’ve been asked this question…..
Now, my stock reply is this: wouldn’t you rather spend a bit of time tacking, than unpicking machine sewing that’s gone wrong? And isn’t tacking more enjoyable than unpicking machine sewing?!

Don’t get me wrong, I don’t tack everything, but honestly, there are some things that I will always tack, mainly set-in sleeves, zips, collars, cuffs, pleats and usually hems get tacked. I just don’t see how it would be possible to get the kind of results I expect without tacking. When it comes to my students, I get beginners to tack most things and my more confident and experienced students will only tack more fiddly things such as sleeves, zips and awkward shaped seams.

I think tacking can also take away a lot of stress for beginners; if seams are held securely in the right place with tacking, newbies can just focus on the machining and being accurate without needing to worry about also removing pins as they go and making sure they don’t sew over them. (That’s right – don’t ever sew over pins, even if they’re placed at right angles to your seam, your needle can still catch the pin and get a slight nick in the needle and I’ve even heard accounts of needles breaking and flying off when people have done this and that’s not a scare story!)
Here are some more uses for hand tacking, that I think can’t be beaten with any other methods:
I have recently become a convert to machine tacking in certain circumstances; a machine tacked seam is stronger than a hand tacked one and so can be useful when fitting and if you machine tack your seam closed before inserting a centred or slot zip you can get really neat results. To set your machine up to machine tack, choose the longest stitch length and a tension setting a bit lower than you would normally chose for the fabric.
At the end of the day, tacking is also a good exercise in reminding us what makers had to do before the days of sewing machines and then look at traditional bespoke tailoring; tacking and sewing is an integral part of how they create such beautiful garments. Come on, what’s good for Savile Row tailors has got to be good for us dressmakers too hasn’t it?!

This post is part of my Q&A column for Love Sewing magazine, issue number 26. Get your copy now to read the other questions I tackle this month on ease and when is the right time to start pattern cutting.

I was really happy to be interviewed for Simply Sewing’s feature called “My Favourite Thing” for this month (issue 14).
It’s on the back page and you might recognise one of my shirt refashions for Portia’s The Refashioners project last summer. I chose it because as well as being really pleased with how it turned out, it’s a project that brings together a lot of my interests and values.
Hope you enjoy reading it (click on the image and it will open full size in another window)!
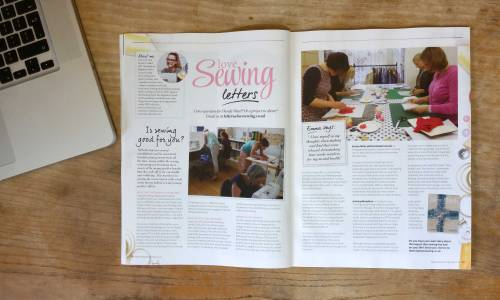
Remember that call out I posted just before Christmas about the beneficial impacts of sewing and generally making things with your hands? Well here it is in print in this month’s Love Sewing magazine.
As is inevitable within the limited space of magazines, things get edited so here’s the full version of what I wrote. Thanks so much to everyone who so generously contributed to this piece. It’s a subject I hope to return to later in the year.
Do you ever lose track of time while you’re sewing? Getting so engrossed in what you’re doing, so concentrated that you completely forget all about those niggly things that have been annoying you? Suddenly realising you have figured out a solution to that tricky problem at work? Feeling much more relaxed and in a better frame of mind than when you started? It’s called flow and is one of the acknowledged benefits of practicing any practical skill, be that sewing, knitting, drawing, throwing pots, making jewellery or playing a musical instrument.
Flow or being “in the zone” when making can send you into an almost meditative state with all the positive health benefits that brings. A clinical study commissioned by the American Home Sewing & Craft Association in 1995 showed measurable drops in heart rate and blood pressure amongst women engaged in sewing and an online survey conducted by Craftsy in January 2014 showed 93% of respondents believed that crafting can help them manage stress and 87% believe that crafting will help combat depression. Pretty powerful stuff.
Being creative and making something with your hands keeps your hand eye coordination sharp and your fingers and hands nimble. I once saw sewing described as yoga for hands – I wish I could remember who said that! Not to mention that learning a new skill keeps the little grey cells busy.
Particular to any kind of making is the “reward” your brain gets from the end result of your efforts and seeing the tangible progress that you’ve made. The same effect can be had from the challenge and glory of problem solving so often necessary in making; you must have experienced getting horribly stuck with something to the point of frustration, walking away and coming back to it with the answer and the elation of not letting it beat you?!
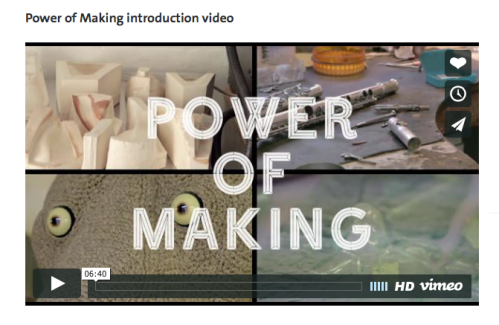
There was a big exhibition at the V&A in 2011 which celebrated the hand made called “The Power of Making”. It included examples of finished objects and lots of video footage of skilled makers at work; for me this was the absolute best bit, I find watching skilled craftspeople working with their hands almost as relaxing as making something myself. You can still see lots of these films online at the V&A website: www.vam.ac.uk and search “Power of Making” they’re well worth 5 minutes of anyone’s time.
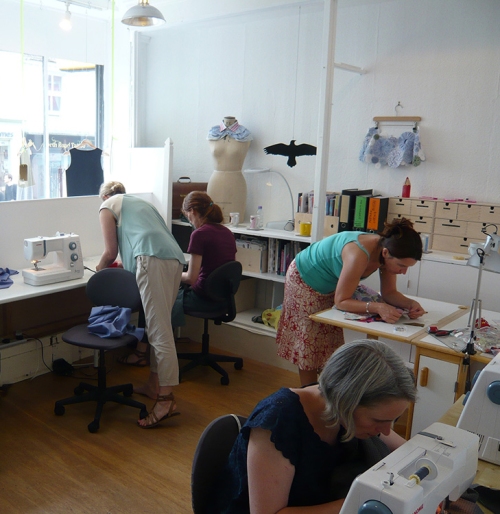
I teach lots of students who lead busy stressful lives and many of them place their sewing classes very high on their list of priorities stating that; “it’s the one time in the week that’s purely for me” or describe their class as “the best part of my week” and will even arrange work and family commitments so that they don’t interfere with their sewing. It’s obviously important to them (not to mention lovely for me to share so many best bits of peoples’ weeks!).
A lot of the benefits that come from creative activities could be labeled as “mindfulness”, something that’s allover the place at the moment; you can read books, download apps, do some colouring-in and take courses to improve your mindfulness, but all it basically means is experiencing and being completely in the here and now. Something you have to do when you’re sewing.
For a while I was teaching an occupational therapist in my dressmaking classes and we regularly chatted about the benefits of working with your hands and being creative, she confirmed that this was a big part of her work; that as humans we’re programmed to want to make stuff and use our hands and that working within mental health for the NHS she regularly used craft and activities like gardening to successfully help patients.
I’ve witnessed people who hardly know each other share fairly intimate stories and experiences in classes. I think it has something to do with the shared experience of being creative in a group, keeping your hands busy and perhaps most importantly; not necessarily making eye contact. It’s easier to talk about difficult stuff if there’s something else going on too, rather than just an intense conversation while looking someone in the eye. The practical activity kind of takes the edge off and helps people open up. How many times have you found yourself fiddling with something in your fingers while having a difficult conversation?
During my years teaching in adult education, I taught a lot of courses in outreach centres; teaching hard to reach adults to help them take their first steps back into education and working life. In small groups I was teaching people who wouldn’t have gone to college, where it was often an achievement to just get out of house, enabling them through creativity to meet people, enjoy the camaraderie of creating in a group where they would support and encourage each other and eventually making new like-minded friends.
I’ve taught students with self-confidence issues, depression and bi polar and the pride they have all taken in creating something, their sense of achievement and that they can see the progress and improvement they are making is tangible. The seemingly simple processes of setting goals, planning and organising that are also involved in learning a creative skill can be hugely empowering for vulnerable people who may have been living a life where much of that control has been taken away. Group creativity and learning can have similar effects on people with serious physical health issues, I’ve taught people who have suffered strokes or undergone intense radiology treatment which has damaged their concentration and short term memory and it seems the repetitive nature of sewing allowed them to feel that it was possible for them to learn something new, a process they had previously found difficult.
Learning is good for you, you have to focus and concentrate and it stops your mind wandering into darker places and worrying about problems.
When I decided to write this piece I put a call-out for people to share their experiences with me and literally within minutes I had anecdotal accounts coming in. You don’t have to look far to hear about the impact that making has had on peoples’ everyday lives. Here are a few accounts that respondents were kind enough to let me share:
Emma Miles @dressmakerssocial on Instagram who came to classes with me using money left to her by her beloved Nana when she died:
“I made my friend her wedding dress in September this year. She hasn’t had the easiest few years and it was whilst I was sewing that I was thinking about both our journeys over the past three years.
I loose myself in my thoughts when making and find that some relaxed dressmaking time works wonders for my mental health. Without attending sewing classes during my own difficult time of depression following my Nana’s death I wouldn’t have had the skills to make the dress.
Making the dress was an emotional time. It felt like all of the grief and difficult times had enabled me to produce something good.”
@robins_thread on Instagram:
“My aunt has tremors in her hands and is currently on a nasty batch of chemo. She knits beautiful moss stitch and ribbed scarfs and her hands don’t tremor when she does it. All the stitches come out just great. She likes doing scarfs because the rhythm and counting is better. It has really helped her feel better with all the chemo side effects too, and loads of the extended family have lovely scarfs from her.”
@misspbluedeva on Instagram:
“Sewing and all things crafty are great for distraction therapy. At my Pain Management Centre they strongly recommend it. It is a great way to turn the pain down and it helps with self worth, which is something we CRPS patients can loose. It gives you a purpose! It may take us longer to complete a project but it feels fantastic to give that project as a present and for it to be appreciated. For anyone with illnesses/disabilities I highly recommend it. There’s nothing better than getting lost in the sewing room for hours on end.”
Even though, as we’ve heard, sewing is undoubtedly good for you and can have positive impacts on your health, I’m seeing an increasing impatience amongst some makers and an insatiable need to make something quickly and finish it in a class. I understand where this comes from (I’m the same sometimes), but it does make me a bit sad as it takes away from the point of the activity: to enjoy the process. If you don’t enjoy the process, well, you might as well just go out shopping.
In response to this, there are growing “slow textiles” and “slow fashion” movements at the moment; makers who celebrate slow processes such as knitting, hand embroidery, hand-sewn patchwork and hand finished details. These processes force us to slow down and savour the process and the benefits it will have on your life rather than just focussing on the end result. Have a look at “Slow Stitch” by Claire Wellesley-Smith for some inspiration.
Thanks to everyone that helped me to write this article, I wish you all continued health and happiness and much joyful sewing.
Posted in Sustainable Sewing, The Fashion & Craft Industries, Writing for Magazines
Tagged crafting, creativity, dressmaking, enjoying the process, flow, Love Sewing magazine, making by hand, mental health, occupational therapy, sewing, sewing is good for you, slow fashion, slow stitch, slow textiles, the power of making, Wendy Ward, working with your hands
